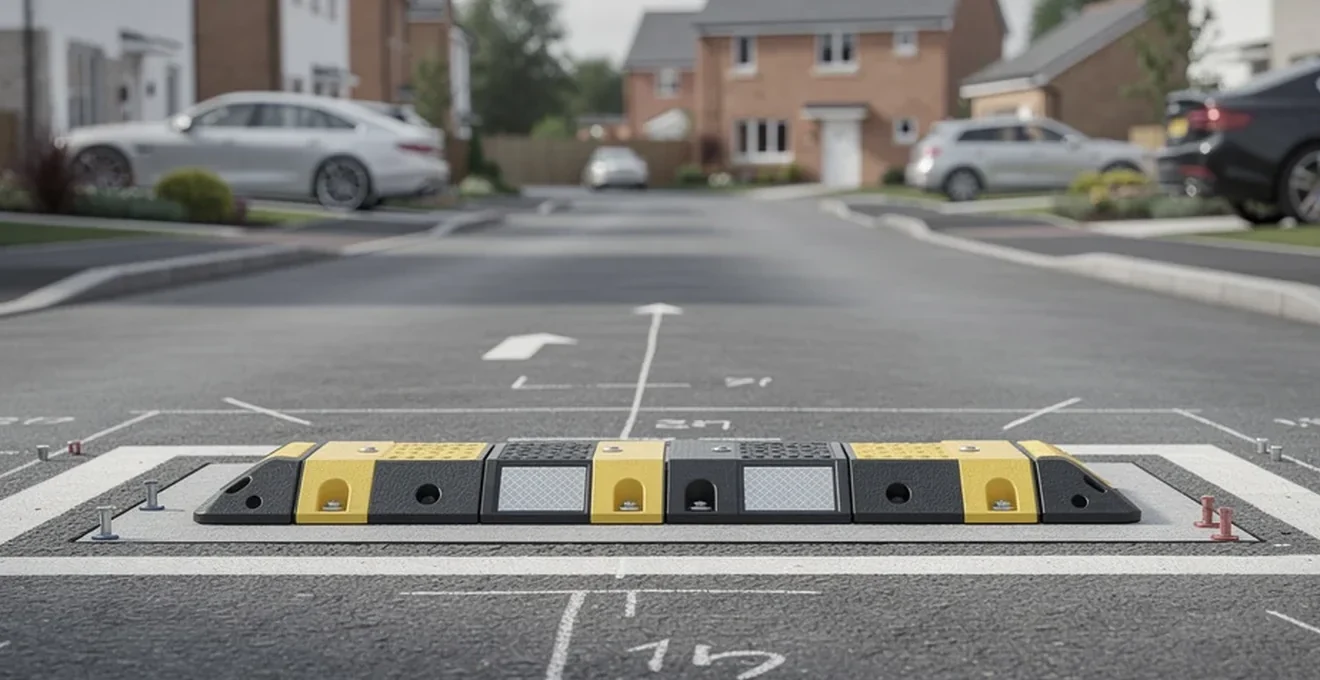
If you’re responsible for a private road, driveway or car park, speed bumps offer a straightforward way to reduce vehicle speeds and improve safety for pedestrians, cyclists and residents. Unlike public highways, private land is not bound by the same statutory traffic calming regulations, which gives site owners more flexibility, but it also means the responsibility for choosing the right product, installing it correctly and managing ongoing safety sits with you. This guide walks through the practical decisions involved: the types of speed bump available, the legal and liability context on private land, how to assess a site before installation, which materials hold up best over time, how installation actually works, and what it costs to buy and maintain a system over the long term.
Speed bump types and their technical specifications
Speed bump is a broad term covering several distinct traffic calming products, each suited to different environments and vehicle types. Choosing correctly starts with understanding what separates a speed bump from a hump, cushion or table.
Speed cushions vs Full-Width road humps
Speed cushions are narrower, segmented units that only span part of the road width. They are designed so that larger vehicles, such as buses, fire engines and other emergency vehicles, can straddle them with their wider wheelbase and pass over with less disruption, while cars are still forced to slow down. This makes them useful in mixed-traffic settings where emergency access needs to be preserved, though they are less common on private installations than full-width modular ramps.
Full-width road humps, by contrast, span the entire carriageway. Every vehicle that crosses them experiences the same slowing effect, which makes them a firmer and more consistent traffic calming measure. On private land, full-width modular speed bumps and ramps are the standard choice for car parks, driveways, industrial yards and workplace entrances, largely because they are simple to retrofit onto existing tarmac or concrete without any resurfacing work.
Speed tables and their Flat-Top design
Speed tables are raised, flat-topped sections of road rather than a simple ramp shape. Instead of a peak, they have a level plateau long enough for a vehicle’s wheelbase to rest on, which produces a more gradual and sustained slowing effect than a standard bump. They are often used near pedestrian crossings, where a longer, flatter raised area also improves visibility and can double as a level crossing point for pedestrians.
Rubber speed bumps vs thermoplastic and asphalt variants
Material choice affects durability, cost and installation method. Recycled rubber speed bumps are widely used because they are impact-resistant, flexible enough to absorb vehicle weight without cracking, and relatively straightforward to bolt down onto a solid surface. High density, high quality PVC is another common option for modular kits, valued for being lightweight yet durable, and less prone to causing damage to vehicles compared with rigid materials.
Concrete speed bumps sit at the other end of the spectrum. They are extremely robust and long-lasting, but they are permanent installations that require groundworks to lay, and they tend to be harsher on vehicle suspension than a modular rubber or PVC system. Asphalt-integrated humps, formed as part of the road surface itself, are typically reserved for public highway schemes rather than private sites, since they require full resurfacing rather than a bolt-down kit.
Modular speed bump kits for temporary installations
For short-term needs, such as construction sites, events or situations where cable protection is required, lightweight modular speed bump kits offer a portable option. These are not designed for long-term heavy traffic, but they are easy to deploy and remove as circumstances change. Permanent modular kits, by comparison, use anchor bolts fixed into a solid substrate and can still be unscrewed and repositioned later if the layout of a site changes, leaving only drill holes behind.
Legal requirements and british standards compliance
Private land is not subject to the same statutory rules that govern public highways, but that does not mean installations exist in a legal vacuum. Understanding where the boundaries lie helps avoid disputes and liability issues.
BS EN 1436 regulations for road marking visibility
Visibility is a genuine safety concern for any raised traffic calming feature, particularly at night or in poor weather. Good practice is to use high-visibility colours, typically yellow and black finishes with reflective elements, so that speed bumps are clearly visible to approaching drivers. Pairing this with adequate lighting and clear signage on the approach reduces the risk of vehicles striking a bump without warning, which is both a safety issue and a potential source of vehicle damage claims.
Highways act 1980 and private road classifications
Speed bumps on public highways fall under strict government regulation, and only local authorities or approved contractors may install them there. Private roads, driveways, car parks and business premises are excluded from these public highway rules, which is why speed bumps on private land do not need a Traffic Regulation Order. However, “private road” is not a single simple category: some private roads are shared by multiple property owners, some have public rights of way running along them, and ownership of the road surface itself is not always straightforward. Where a road is shared, installing speed bumps without the agreement of other owners or users can create serious legal and practical problems, including disputes over damage, obstruction and the right to alter a shared access route unilaterally.
Local council planning permission requirements
Installing speed bumps or cushions on private land generally does not constitute development, so explicit planning permission is not usually required. That said, permission from the landowner is always necessary, and where a road is shared, agreement from all owners is essential rather than optional. If the property is Listed or sits within a conservation area, additional checks should be made, since alterations in these settings can attract separate scrutiny. Where a managed estate or leasehold property is involved, the decision on installing speed bumps typically rests with the freeholder, management company or residents’ association, not with an individual resident acting alone.
Liability considerations under occupiers’ liability act 1957
Landowners and occupiers owe a duty of care to people using their land, including drivers and pedestrians affected by traffic calming measures. A speed bump that is poorly positioned, unmarked, badly maintained or unsuitable for the vehicles using the site can create a hazard rather than reduce one. Disputes have arisen where residents on a shared private road have installed makeshift bumps, such as cut lengths of timber staked into the surface, without consulting other users, and where those bumps have gone on to damage vehicles. A sign stating that road users proceed “at their own risk” does not necessarily remove liability, particularly if other residents never agreed to the installation or if the measure itself is poorly constructed. Using a purpose-made, correctly specified speed bump kit, installed with the agreement of all relevant parties and clearly signed, is a far safer approach than an improvised solution, both for safety and for limiting legal exposure.
Site assessment criteria for optimal placement
Before ordering a kit, it is worth assessing the site properly. Getting placement and specification right the first time avoids costly repositioning later.
Traffic volume and vehicle type analysis
The mix of vehicles using a site should drive the choice of speed bump height. Cars are suited to both 50mm and 75mm bumps, but vans and pickups generally respond more predictably to the firmer 75mm option. For HGVs, however, 50mm is typically the better choice, since taller 75mm ramps wear faster under heavy axle loads. Sites with a genuinely mixed fleet, including frequent large vehicles such as delivery lorries or forklifts, need particular thought, since some heavy machinery cannot safely cross certain bump profiles at all.
Gradient and drainage considerations
The surface a speed bump sits on matters as much as the bump itself. Installations require a solid, stable substrate such as concrete or good quality tarmac; gravel or loose surfaces will not hold fixings securely over time. On uneven or ageing surfaces, including block paving or patched tarmac, taller 75mm bumps can rock unless very securely fixed, and block paving in particular risks breaking up under repeated vehicle loading. Where the existing surface is unsuitable, laying a solid concrete strip specifically where the speed bump will sit is a practical workaround rather than resurfacing the whole area.
Spacing calculations between multiple speed bumps
Spacing affects how consistently traffic is slowed along a run. If bumps are placed too far apart, drivers tend to accelerate between them, undermining the calming effect. As a general guide, speed bumps are spaced between 20 and 150 metres apart, with around 70 metres being a typical average. For modular kits, it is also worth leaving a gap at either side of the road width, both for drainage and to give cyclists a way through without crossing the raised section.
Sightline and visibility distance requirements
Drivers need enough warning distance to slow down comfortably before reaching a speed bump. Signage warning of speed bumps ahead is best placed around 20 metres before the first row, giving drivers time to react. On longer runs or shared access roads, it is also worth thinking about approach visibility and gradients, particularly where the road bends or where pedestrians are likely to be walking in the carriageway itself, as is often the case on private roads without pavements.
Material durability and weather resistance factors
A speed bump has to withstand years of vehicle loading, weather exposure and, on some sites, heavy vehicle traffic. Material choice has a direct bearing on how well it performs over that lifespan.
UV stabilised rubber compounds for longevity
Colour retention matters both for visibility and appearance, especially on customer-facing sites such as retail car parks. Premium kits that use solid yellow PVC running through the material, rather than a surface coating, will not fade or wear away in the way a painted finish can. Standard or value kits using painted finishes over recycled PVC cost less initially but are more prone to weathering, so the choice depends on how visible the installation is and how important long-term appearance is to the site.
Freeze-thaw resistance in recycled rubber products
High quality recycled PVC speed bumps are built to last many years, including installations that have been in place through repeated seasonal cycles in supermarket car parks and industrial estates. On sites with heavy use, it is typically the central sections that wear first and need replacing, rather than the end caps, so buying a system where individual parts can be replaced separately is more cost-effective than replacing an entire run.
Load-bearing capacity for HGV and heavy vehicle traffic
Standard modular speed bumps are generally rated to take road-legal vehicles, including HGVs up to 44 tonnes. However, on sites where heavy vehicles use the speed bumps constantly, reinforced or heavy-duty variants are a better long-term investment than standard kits, since sustained heavy axle loads accelerate wear, particularly on taller 75mm profiles. Matching the load rating of the product to the realistic vehicle mix on site avoids premature failure and repeated replacement costs.
Installation methods and anchoring systems
Correct installation is what determines whether a speed bump performs safely and stays secure over time. Modular systems are designed to be fitted by a competent person without specialist contractors.
Bolt-down fixings versus adhesive bonding techniques
Most modular speed bump kits use a bolt-down fixing system: an oversized plug and screw, sometimes described as a universal fixing, suitable for both tarmac and concrete. Inner sections typically require four fixings, while end sections need two. This approach has a key advantage over adhesive bonding: it can be undone. Bolt-down sections can be unscrewed and removed or repositioned later, leaving only drill holes, which makes it a flexible option if a site layout changes in future.
Asphalt embedding for permanent installations
Some heavier-duty or public-style installations involve embedding the speed hump directly into the asphalt as part of the road surface. This is a genuinely permanent solution but requires proper groundworks and resurfacing, putting it in a different cost and complexity bracket compared with a bolt-down modular kit. For most private sites, including driveways, car parks and business forecourts, a modular bolt-down system delivers similar traffic calming performance without the disruption of resurfacing work.
Surface preparation for concrete and tarmac substrates
Installation itself is a fairly quick process for a confident installer: lay the sections out to check alignment and spacing, mark the fixing holes through the pre-formed apertures, drill to the correct depth for the supplied anchors, clear debris from the holes, then tap the sections together with a mallet before inserting and tightening the anchor bolts and fitting the end caps. A heavy-duty electric SDS drill is strongly recommended, and a nut driver or setter can speed up the process of tightening each fixing considerably on longer runs.
One preparation point is easy to overlook: fresh tarmac needs time to cure before drilling. Fixings installed into tarmac that has not fully settled are prone to working loose as the surface continues to compact, so it is worth allowing several days after resurfacing before installing speed bumps. It is also worth checking that fixings remain tight after the first few weeks of traffic, since this is when any settling is most likely to show up, and periodically after that as routine maintenance.
Cost analysis and maintenance planning
Budgeting for speed bumps involves more than the upfront purchase price. Material choice, expected traffic volume and maintenance needs all affect the real cost of ownership over time.
Upfront purchase price versus Long-Term durability
Modular PVC or rubber speed bump kits sit at a more accessible price point than concrete installations, and because they do not require resurfacing or contractor labour, the total installed cost is typically far lower. However, cheaper painted-finish kits, while less expensive initially, are more likely to need repainting or earlier replacement than premium kits with colour running through the material. For sites with heavy or constant traffic, choosing a heavier-duty or reinforced product from the outset is usually more economical than repeatedly replacing a lighter-duty kit that wears out under load.
Reflective coating reapplication schedules
Because visibility is central to both safety and liability, any reflective or high-visibility coating needs to be checked periodically and reapplied if it starts to degrade. Painted yellow finishes over recycled PVC are more prone to this kind of wear than solid-colour premium sections, so sites using standard kits should build periodic recoating into their maintenance planning, particularly on high-traffic or customer-facing installations.
Replacement cycles for High-Traffic private estates
On busy private sites, such as industrial estates or large shared car parks, it is realistic to expect central sections to wear out before end caps, simply because they absorb the bulk of the vehicle loading. Buying from a system where individual parts, rather than entire runs, can be purchased and swapped in keeps ongoing maintenance costs down. Routine checks, sweeping away grit and debris that accumulates against the sections, and tightening fixings intermittently after the initial settling-in period, all help extend the working life of an installation and reduce the frequency of full replacement.