
The primary cause of barrier damage isn’t the quality of your products, but critical errors in your application procedure and environment.
- A “squeaky clean” feeling is a clinical sign of a stripped acid mantle, not cleanliness.
- Incorrect layering of serums and ignoring environmental factors like hard water can render expensive ingredients ineffective or irritating.
Recommendation: Shift focus from acquiring new products to mastering a foundational, technically correct routine to allow the skin’s lipid matrix to properly heal.
You follow a meticulous skincare routine, investing in well-formulated, often expensive, products. Yet, you are consistently met with redness, persistent sensitivity, and a feeling that your skin is reactive and uncomfortable. This clinical paradox is a common source of frustration for many patients. The assumption is that a higher price tag or a more complex regimen should yield better results, but when it doesn’t, the instinct is to add yet another “holy grail” product, further complicating the issue.
The conventional wisdom to “use a gentle cleanser” or “moisturize more” falls short because it fails to address the underlying mechanism of the damage. The problem often lies not in the *ingredients* you are using, but in the *procedural integrity* of your routine. Factors like the pH of your cleanser, the order and timing of application, and even the mineral content of your tap water can systematically dismantle your skin’s protective lipid matrix, known as the stratum corneum.
But what if the solution wasn’t in your next purchase, but in correcting the fundamental, often-overlooked steps of your current regimen? This guide moves beyond product recommendations to provide a dermatologist’s corrective framework. We will diagnose the true state of your skin, dismantle the procedural errors that sabotage your efforts, and establish a clinical protocol to rebuild a resilient, healthy skin barrier from the ground up. This is about transforming your technique, not your shopping cart.
This comprehensive guide details the precise, step-by-step clinical approach to repairing your skin’s natural defenses. The following sections break down the most common procedural mistakes and provide corrective actions to restore barrier function and achieve lasting skin health.
Summary: Why Your Expensive Skincare Routine Is Damaging Your Skin
- How to Determine Your True Skin Type with the “Bare Face” Method?
- The “Squeaky Clean” Feeling Mistake That Destroys Your Microbiome
- Gel, Cream, or Oil: Which Cleanser Won’t Strip Your Dry Skin?
- How to Layer Serums so They Don’t Pill or Ball Up?
- How Long Must You Wait Between Retinol and Moisturizer?
- How to Heal a Damaged Barrier in Less Than 2 Weeks?
- The Residue Error That Leads to Dullness and Breakouts
- Why Is a “Squeaky Clean” Feeling Actually a Sign of Skin Damage?
How to Determine Your True Skin Type with the “Bare Face” Method?
Before any corrective action can be taken, an accurate diagnosis is essential. Many individuals misdiagnose their skin type because they are assessing a barrier that is already compromised. Chronic inflammation and dehydration can make oily skin appear dry and flaky, or normal skin feel tight and sensitive. To get a true reading, you must first create a neutral baseline. The “Bare Face” method is a clinical standard for this purpose, but it is only effective on skin that is not in a state of distress.
Therefore, a preparatory “barrier reset” is the critical first step. This involves temporarily ceasing all active ingredients—including retinoids, vitamin C, and exfoliating acids (AHAs/BHAs)—that could be contributing to irritation. For a period of approximately seven days, your routine should be reduced to the bare essentials: a gentle, pH-balanced cleanser and a ceramide-rich moisturizer. This allows the skin’s inflammatory responses to calm down, revealing its true underlying characteristics.
Once this reset period is complete, you can perform the test:
- Cleanse your face with a gentle cleanser and lukewarm water.
- Gently pat your skin dry with a soft towel. Do not rub.
- Do not apply any toners, serums, or moisturizers.
- Wait for 30-60 minutes and observe your skin in a mirror.
After the waiting period, assess the results. True oily skin will show a noticeable shine on the forehead, nose, and chin (the T-zone). Dry skin will feel tight, possibly with some flaking, and show no oil. Combination skin will exhibit oil in the T-zone but feel tight or normal on the cheeks. Normal skin will feel comfortable and show no significant oil or tightness. This simple diagnostic tool removes the guesswork and provides the foundational knowledge needed to select the correct products going forward.
The “Squeaky Clean” Feeling Mistake That Destroys Your Microbiome
One of the most pervasive and damaging myths in skincare is the belief that a “squeaky clean” feeling signifies healthy, clean skin. From a clinical perspective, this sensation is a primary red flag indicating that your skin’s acid mantle has been stripped. This mantle is a very fine, slightly acidic film on the surface of the skin that acts as a crucial barrier against pathogens, environmental pollutants, and moisture loss. Its integrity is paramount for a healthy skin barrier.
The surface of human skin has a natural pH level of about 4.0 to 4.5, making it mildly acidic. This acidity fosters a healthy skin microbiome—the complex ecosystem of beneficial bacteria that protects you from harmful microbes. When you use a harsh, alkaline cleanser (many foaming and bar soaps have a pH of 9 or higher), you acutely disrupt this delicate balance. The “squeaky” feeling is the result of the cleanser stripping away not just dirt and grime, but also the essential lipids and sebum that form the acid mantle.

This immediate disruption leaves your skin vulnerable. As the Annmarie Skin Care Research Team notes, this state of altered pH has significant consequences. It opens the door for pathogenic bacteria to proliferate, leading to breakouts and inflammation, and it accelerates transepidermal water loss (TEWL), resulting in dehydration and sensitivity.
A pH level that is too alkaline will disrupt the skin’s acid mantle, leaving it vulnerable to bacterial and environmental attack, and accelerating the aging process.
– Annmarie Skin Care Research Team, How the pH of Your Cleanser Affects Your Skin’s Acid Mantle
Choosing a cleanser should not be about achieving a stripped feeling, but about effectively cleaning the skin while respecting its natural chemistry. A healthy skin barrier feels soft, hydrated, and calm after cleansing—never tight or squeaky.
Gel, Cream, or Oil: Which Cleanser Won’t Strip Your Dry Skin?
Once you understand that the goal of cleansing is to clean without stripping, selecting the right cleanser formulation becomes a critical decision, especially for skin with a compromised barrier. Gel, cream, and oil cleansers are not interchangeable; they are formulated with different surfactant systems and are designed for different clinical needs. For dry, sensitive, or damaged skin, the choice of cleanser can either support healing or perpetuate the cycle of irritation.
Gel cleansers are typically designed for normal to oily skin types. They provide a satisfying lather and effectively remove excess sebum. However, it is crucial to select one that is explicitly labeled “pH-balanced” (around 5.5). Many gel cleansers can be too stripping for dry skin, exacerbating tightness and dehydration. Cream and milk cleansers, on the other hand, are emulsions of water and oil with very gentle surfactants. They cleanse the skin with minimal disruption to the lipid barrier, often leaving it feeling soft and moisturized. They are the clinical standard for dry and sensitive skin types.
Oil and balm cleansers work on the principle of “like dissolves like.” They are highly effective at breaking down oil-based impurities such as makeup, sunscreen, and excess sebum without stripping the skin’s natural oils. They are an excellent choice for all skin types as the first step in a double-cleansing routine, or as a single cleanse for very dry skin. The key is to ensure they are properly emulsified with water and rinsed clean.
The following table provides a clinical overview of how different cleanser types impact the skin’s barrier function based on their typical pH.
| Cleanser Type | Typical pH Range | Best For | Barrier Impact |
|---|---|---|---|
| Traditional Soap | 9-11 | Not recommended | Highly disruptive |
| Gel Cleanser | 5.5-7 | Oily skin | Moderate if pH-balanced |
| Cream Cleanser | 5-6.5 | Dry/sensitive skin | Gentle, protective |
| Oil/Balm Cleanser | 5-6 | All skin types | Most protective |
| Micellar Water | 5.5-7 | Light cleansing | Gentle if rinsed |
For a patient with a damaged barrier, the recommendation is unequivocal: switch immediately to a cream, milk, or balm cleanser to minimize further disruption and support the healing process.
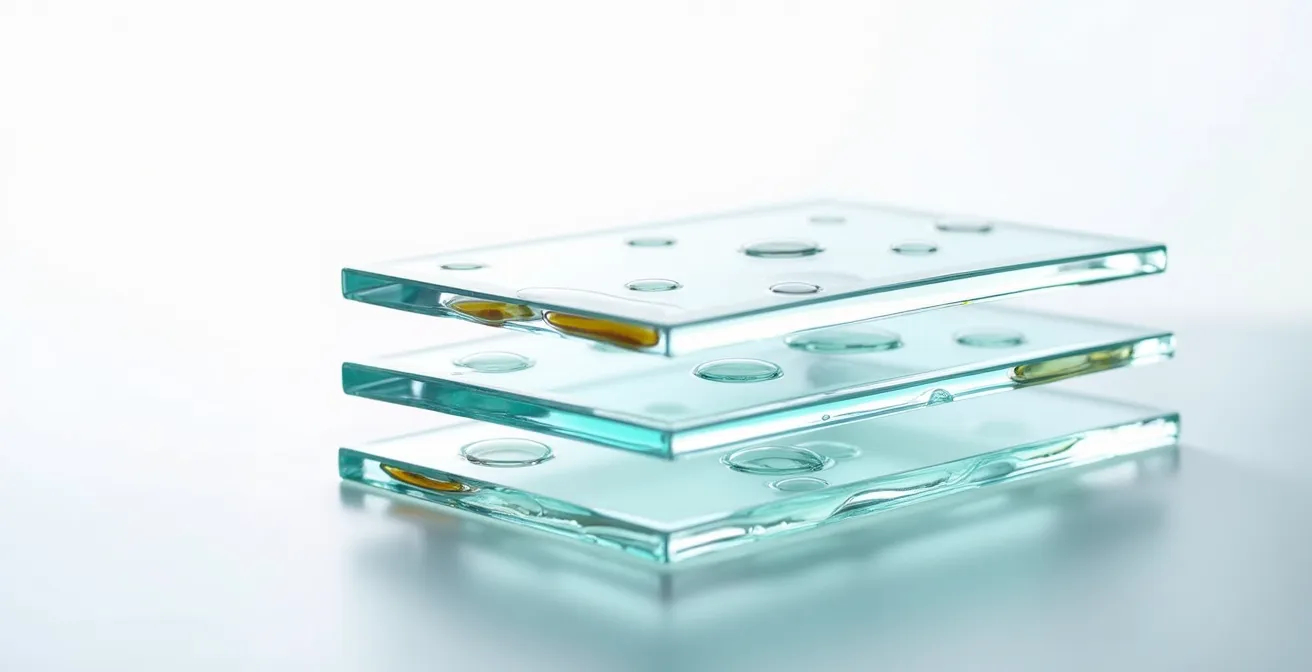
How to Layer Serums so They Don’t Pill or Ball Up?
Product “pilling”—when products ball up into little flakes on the skin’s surface—is a clear sign of procedural error in layering. It indicates that your products are not absorbing correctly and are instead sitting on top of the skin, rendering their expensive ingredients useless. This issue is typically caused by three main factors: applying too much product, layering in the incorrect order, or incompatible formulations clashing on the skin.
The cardinal rule of layering is to apply products from the thinnest consistency to the thickest. This generally means water-based products should be applied before oil-based products. A typical sequence would be: cleanser, toner/essence, water-based serums (like hyaluronic acid), and then richer serums or moisturizers. Applying a thick, occlusive cream before a lightweight, water-based serum will prevent the serum from penetrating the skin entirely.
Another common cause of pilling is an interaction between certain ingredients, most notably silicones (like dimethicone) and carbomers. If you apply a silicone-heavy primer or moisturizer over a serum that hasn’t fully absorbed, the silicone can cause the product underneath to ball up. The solution is twofold: check ingredient lists for potential conflicts and, most importantly, allow adequate absorption time between layers. A waiting period of 30 to 60 seconds between each product application is a simple yet highly effective way to prevent pilling.
Finally, application technique matters. Instead of rubbing products vigorously into the skin, which can cause friction and pilling, gently pat or press them in with your fingertips. This technique aids absorption without disturbing the previous layer. If pilling persists, the first corrective measure should be to reduce the amount of product used by half. Often, less is more.
How Long Must You Wait Between Retinol and Moisturizer?
The question of how long to wait between applying retinol and moisturizer is a frequent point of confusion, and the answer depends on your goal and your skin’s current condition. The traditional advice to wait 20-30 minutes after applying retinol was based on older, less stable tretinoin formulations and the theory that allowing the retinol to absorb fully without any “buffer” would maximize its efficacy. While there is some logic to this, modern dermatology recognizes the importance of balancing efficacy with tolerability, especially for compromised skin.
With modern, encapsulated retinol formulas, the ingredient is released slowly over time, making the long wait time largely unnecessary for absorption. For most individuals with a healthy skin barrier, waiting just a minute or two until the retinol serum is no longer tacky is sufficient before applying moisturizer. The moisturizer will not dilute the retinol’s effectiveness but will play a crucial role in mitigating potential side effects like dryness and irritation by reinforcing the skin barrier.
For patients with a damaged barrier or those new to retinoids, a technique called “buffering” is clinically recommended. This involves applying a layer of moisturizer *before* the retinol, or mixing the retinol directly with the moisturizer. While this may slightly reduce the penetration speed of the retinol, it significantly improves tolerability and helps prevent the irritation that can further damage a compromised barrier. You can also apply moisturizer first, wait for it to absorb, apply retinol, and then apply another thin layer of moisturizer on top—the “sandwich” method.
It’s also critical to avoid using other potentially irritating actives in the same routine as retinol, especially when your barrier is healing. High concentrations of Vitamin C or exfoliating acids can lead to over-irritation. In fact, some active ingredients can be irritating on their own if the concentration is too high; for example, niacinamide concentrations over 10% can be irritating when the barrier is damaged. The focus must be on repair and support, not aggressive treatment.
How to Heal a Damaged Barrier in Less Than 2 Weeks?
Healing a damaged skin barrier is a process of intensive support and the removal of all aggressors. While severe damage can take up to six weeks or more to fully resolve, a significant clinical improvement can often be achieved in as little as two weeks with a strict, targeted protocol. The strategy is to stop doing things that harm the barrier and start providing the precise components it needs to rebuild its lipid matrix.
The core building blocks of the skin barrier are ceramides, cholesterol, and free fatty acids. A damaged barrier is, by definition, deficient in these lipids. A 2024 study highlights that changes in ceramide levels and composition are directly evidenced in various skin conditions. Therefore, the primary therapeutic goal is to topically replenish them. Look for moisturizers and serums specifically formulated with this “big three.” Clinical studies have shown their efficacy; one such study demonstrated that a cream containing Ceramide NP significantly increased ceramide levels in the skin while decreasing inflammatory markers.
A two-week intensive protocol would look like this:
- Week 1 (Days 1-7): Skincare Detox and Lipid Loading. Immediately cease all active ingredients (retinoids, acids, vitamin C). Your routine should consist only of a gentle cream cleanser, a moisturizer rich in ceramides, cholesterol, and fatty acids, and a mineral-based SPF 30+ during the day. Apply the moisturizer to damp skin to lock in hydration.
- Week 2 (Days 8-14): Introduce Hydrators and Anti-Inflammatories. Continue the core routine. Now, you can introduce a hydrating serum containing hyaluronic acid or glycerin on damp skin *before* your moisturizer. You can also add a serum with a low concentration of niacinamide (5% is ideal) to help reduce inflammation and further support ceramide synthesis.
Throughout this period, environmental and behavioral factors are just as important. Avoid hot water when washing your face, as it strips lipids. Pat your skin dry with a soft, clean towel—never rub. If you live in a dry climate, using a humidifier at night can significantly reduce transepidermal water loss while you sleep. Adherence to this strict protocol provides the skin with an optimal healing environment.
The Residue Error That Leads to Dullness and Breakouts
Even with the right products and layering technique, a final procedural error can sabotage your skin barrier: residue. What is left on your skin after cleansing is just as important as what is removed. Residue from cleansers or minerals from tap water can create a film on the skin that impedes the absorption of subsequent products, leading to a dull complexion and even clogged pores.
One of the most overlooked sources of residue is hard water. As one analysis explains, hard water contains high levels of alkaline minerals like calcium and magnesium. When these minerals are left on the skin, they can raise its pH, disrupt the acid mantle, and react with sebum to form a pore-clogging film. This is why skin can sometimes feel tight or look dull after washing, even with a gentle cleanser. A final rinse with filtered or distilled water, or wiping the face with a hydrating, pH-balancing toner on a cotton pad, can effectively remove these mineral deposits.
Cleanser residue is another common problem. Oil cleansers that are not properly emulsified or micellar waters that are not rinsed off can leave behind surfactants and oils. These substances can interfere with the absorption of your expensive serums and, in the case of surfactants, can be a source of low-grade, chronic irritation. Always ensure you are rinsing thoroughly with lukewarm water for at least 30 seconds. If using an oil cleanser, add water gradually and massage until a milky emulsion forms before rinsing completely.
A final check for residue is to observe if your products are pilling. If they are, it’s a strong indicator that a film is preventing them from absorbing properly. An audit of your cleansing and rinsing habits is a crucial final step in optimizing your routine for barrier health.
Action Plan: Your Residue Removal Audit
- Points of Contact: Identify all potential sources of residue. This includes your tap water (is it hard?), your first and second cleansers, and any makeup removers.
- Collecte: Inventory your products. Check for ingredients known to leave a film, such as heavy silicones in primers or certain oils in cleansers that don’t emulsify well.
- Coherence: Evaluate your rinsing technique. Are you using lukewarm water? Are you rinsing for at least 30 seconds? Do you fully emulsify your oil cleanser before washing it off?
- Mémorabilité/émotion: Assess your post-cleanse skin feel. Is there any perceptible tightness (mineral residue) or a slippery film (surfactant residue)? Does pilling occur when you apply your first serum?
- Plan d’intégration: Create a corrective action plan. This could involve installing a tap filter, using a final rinse with bottled water, switching to an easily emulsified oil cleanser, or always following micellar water with a traditional cleanse.
Key Takeaways
- Barrier damage often stems from procedural mistakes, not poor product choice.
- A “squeaky clean” feeling is a clinical sign of a stripped acid mantle and a disrupted microbiome.
- Mastering the correct layering technique (thin to thick, allowing absorption time) and eliminating residue are critical for product efficacy.
Why Is a “Squeaky Clean” Feeling Actually a Sign of Skin Damage?
To put it in the starkest clinical terms, the “squeaky clean” sensation is the tactile feeling of a compromised stratum corneum. It is not cleanliness; it is the absence of the essential lipids that maintain your skin’s structural integrity and hydration. This feeling is a direct result of using cleansers that are too alkaline for the skin’s naturally acidic pH.
The pH scale is logarithmic, meaning a small numerical difference represents a massive chemical one. As one source clarifies, a cleanser with a pH of 8 is not just slightly more alkaline than neutral water (pH 7), it is 100 times more alkaline than a cleanser with a pH of 7. When such a product is applied to skin that thrives at a pH of 4.5, the acid mantle is chemically obliterated. This action emulsifies and washes away the protective sebum and intercellular lipids that hold your skin cells together like mortar between bricks.
Without this lipid mortar, two things happen. First, microscopic cracks form in the skin barrier, allowing irritants and pathogens to penetrate more deeply, triggering inflammation and sensitivity. Second, the skin’s ability to hold onto water is severely impaired, leading to a rapid increase in transepidermal water loss (TEWL). This is what causes the feeling of tightness, and over time, leads to chronic dehydration, flaking, and a dull, lackluster appearance. As Dr. Tarj Mavi succinctly states:
“Squeaky skin” often means dried our skin that has lost all of its sebum, which as you can guess is not a good thing at all.
– Dr. Tarj Mavi, LAMAV – pH Balance and Skin Health
In essence, chasing that “squeaky clean” feeling is an act of actively dismantling your skin’s natural defenses. The long-term goal for a healthy barrier is to cleanse the skin in a way that leaves it feeling comfortable, hydrated, and balanced—the complete opposite of squeaky.
By shifting your focus from accumulating products to perfecting your procedure, you can transform your routine from a source of frustration into an effective, clinical method for building and maintaining a resilient skin barrier. Start today by auditing your cleansing step and committing to a protocol that respects your skin’s natural biology.